
Chaphil3
New Member
I guess the next question is the place to mount the ballasts and where to get the ground...
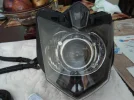
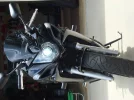
I don't wanna still cavcuz's diy thunder lol. That was a rough one for me. I removed one of the silver bolts on the drivers side and (after mounting the included bracket for the ballast) mounted it there. Here's a pic:


Only problem here is that the forks hit the ballast just barely on full left turn. I was up and down whether to keep it but it didn't affect my steering after trying some low speed tight turns. Gonna have to move the relay tho bc the side plastic (not the fairing) hits just a little and won't close. But the ballast location works fine.
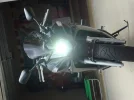
As far as ground, use any non-painted screw. I used the exact same bolt as the ballast but on the other side to get rid of some of the slack.


 no love ...jk