Retro Fit kit


Chaphil3

New Member
I guess the next question is the place to mount the ballasts and where to get the ground...
I don't wanna still cavcuz's diy thunder lol. That was a rough one for me. I removed one of the silver bolts on the drivers side and (after mounting the included bracket for the ballast) mounted it there. Here's a pic:
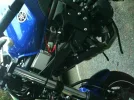
Ballast location.jpg
Ballast location 2.jpg

Only problem here is that the forks hit the ballast just barely on full left turn. I was up and down whether to keep it but it didn't affect my steering after trying some low speed tight turns. Gonna have to move the relay tho bc the side plastic (not the fairing) hits just a little and won't close. But the ballast location works fine.

As far as ground, use any non-painted screw. I used the exact same bolt as the ballast but on the other side to get rid of some of the slack.

ground.jpg
 

cavcuz05

New Member
I don't wanna still cavcuz's diy thunder lol. That was a rough one for me. I removed one of the silver bolts on the drivers side and (after mounting the included bracket for the ballast) mounted it there. Here's a pic:
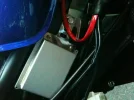
View attachment 21422
View attachment 21423

Only problem here is that the forks hit the ballast just barely on full left turn. I was up and down whether to keep it but it didn't affect my steering after trying some low speed tight turns. Gonna have to move the relay tho bc the side plastic (not the fairing) hits just a little and won't close. But the ballast location works fine.

As far as ground, use any non-painted screw. I used the exact same bolt as the ballast but on the other side to get rid of some of the slack.
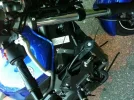
View attachment 21424
its all good...finally got everything off today...my new shroud will be here tomorrow and ill use your pics for the DIY...we all need help sometimes and with a CO-OP DIY like this the more input the better...i have the rest of the diy in word right now just waiting to finish before i post everything
 

Chaphil3

New Member
I can't seem to get the ring tight enough to keep the projector from wiggling...
I took my dremel and gently ground the outside of the ring down (not much prob just mm's) bc it was getting caught as it turned. And then when i couldn't turn it by hand, i took a screwdriver and turned it using the little grooves that are in it. Make sure you have the rubber o-ring on bc it helps keep it snug
 

qnoisx

New Member
I received my kit in the mail yesterday, but I won't have time to work on it till Monday or Tuesday. I'm working all weekend. Hopefully Cavcuz will have his DIY ready by then. Are you guys running the wiring all the way back to the battery or tapping into the existing headlight wiring? Just curious.
 

cavcuz05

New Member
I received my kit in the mail yesterday, but I won't have time to work on it till Monday or Tuesday. I'm working all weekend. Hopefully Cavcuz will have his DIY ready by then. Are you guys running the wiring all the way back to the battery or tapping into the existing headlight wiring? Just curious.
i will be running it back to the battery
 

cavcuz05

New Member
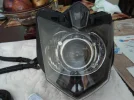
well got everything done today except for putting the plastics on...light works and man does it look sweet...i took plenty of pics and i will be finishing the DIY VERY soon

a little teaser
 

Attachments

cavcuz05

New Member
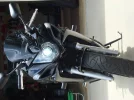
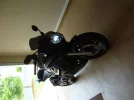
Well here she is all done...boy was this a long process but im very happy with how it turned out...light need to be adjusted slightly but all in all patience is a must here...dont rush anywhere or YOU will break things...thankfully i had my wife helping me and she slowed me down quite a bit
 

Attachments

Last edited:

qnoisx

New Member
Looks great! Hopefully I can get to work on mine either tomorrow after work or Tuesday. Did you happen to grab a before pic of the stock headlight beam? If not I can do that before I start to add to the writeup.
 

cavcuz05

New Member
nope i figured everyone on here knows what there stock headlight beam look like but if you take one ill use it in my write up
 

cavcuz05

New Member
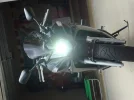
here is what it looks like at night...i still need to adjust the beam but all in all it will suffice for night driving


Rabbitman109

Lumen Junkie
Elite Member

Sage

Well-Known Member
That thing looks mean Chad, nice job. Same to you cav, i like the amount of light alot
 

CrazyCawi

New Member
Chad...is your middle name god? because your bike is nothing short of pure perfection. It gives me so many things I want to strive for with my bike. I absolutely love the look of your install, and the blue centerpiece deffinately sets off the front end!

one word: JEALOUS.

:cool:
 

Rabbitman109

Lumen Junkie
Elite Member

cavcuz05

New Member
Thanks CC, I knew that it would be a welcomed mod...I had the idea after looking at some other installs, where they blacked out the housing. I really just love motorcycles, and enjoy personalization. I have thought that it would be cool to go into a customizing business. I really appreciate the kind words, and it is like I have told other members, I am just glad that I can give people ideas, and motivate mods that normally wouldn't have been tried. I enjoy helping others do the same with their bikes. Now, I need a road test...

hows your beam? does it need slight adjustment to? where dis you end up muonting the ballast?
 

cavcuz05

New Member
Chad...is your middle name god? because your bike is nothing short of pure perfection. It gives me so many things I want to strive for with my bike. I absolutely love the look of your install, and the blue centerpiece deffinately sets off the front end!

one word: JEALOUS.

:cool:
:(no love ...jk
 

Rabbitman109

Lumen Junkie
Elite Member

iSpoolin

New Member
Yall went all out on the ballast mounting lol, I just used some 3m double sided tape and mounted mine to the frame next to the forks.


Top