'09 FZ6R SW-Motech Center Stand Installation - How To
One way to repay what you received is to give back something. Well I took a lot of info and ideas out of this forum now it's my time to give something back.
I'm going to start with the "How To" install of SW-Motech Center Stand.
MAKE SURE YOU READ http://www.600cc.org/forum/f89/aftermarket-center-stand-now-available-18131/#post233266 BEFORE YOU BUY IT.
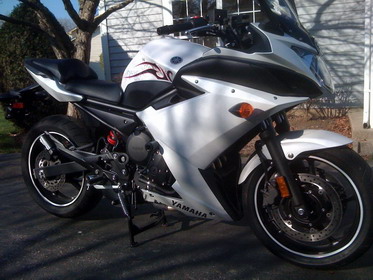
Complete name detail: HPS.06.656.10000/B SW-Motech Centerstand (Yamaha FZ6R & XJ6, '09-)
I purchased it from TwistedThrottle.com : SW-Motech Centerstand (Yamaha FZ6R & XJ6, '09-) - HPS.06.656.10000/B and end up paying $152.89 delivered.
Here is a copy of the installation instructions that came with the center stand: http://www.twistedthrottle.com/filemanager/download/2284/
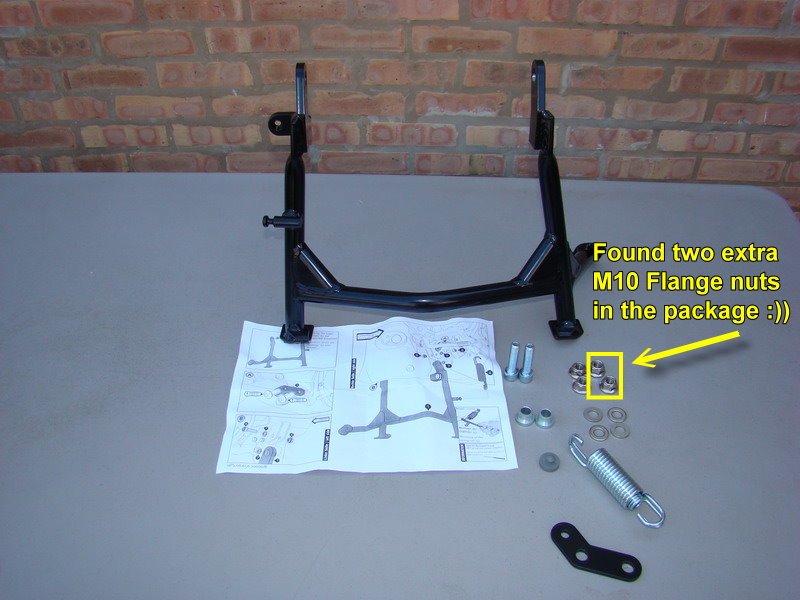
What comes in the package:
Center Stand
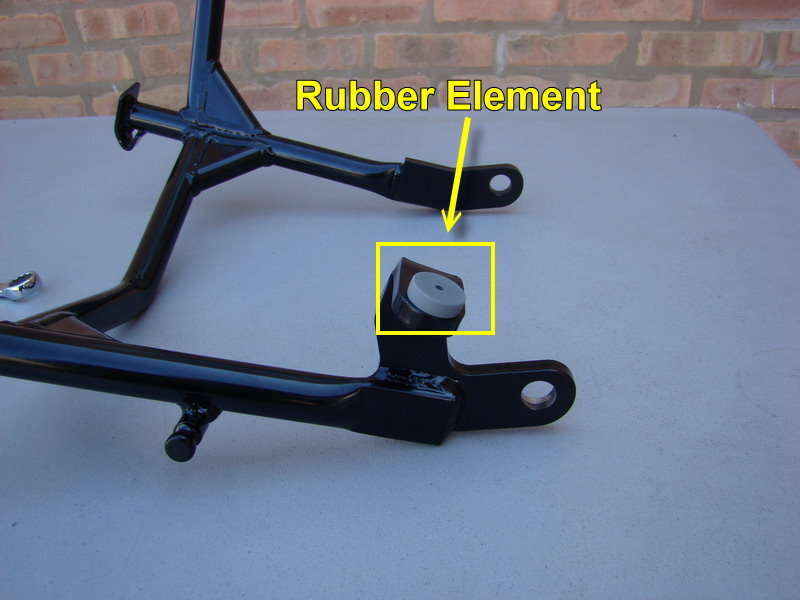
Rubber Element
Spring Bracket
Spring Set
Bushing x2
Hexagon Socket Screw (Size: M10 x 40) x2
Washer x4
Lock Nut with Flange x2
Mounting Instructions
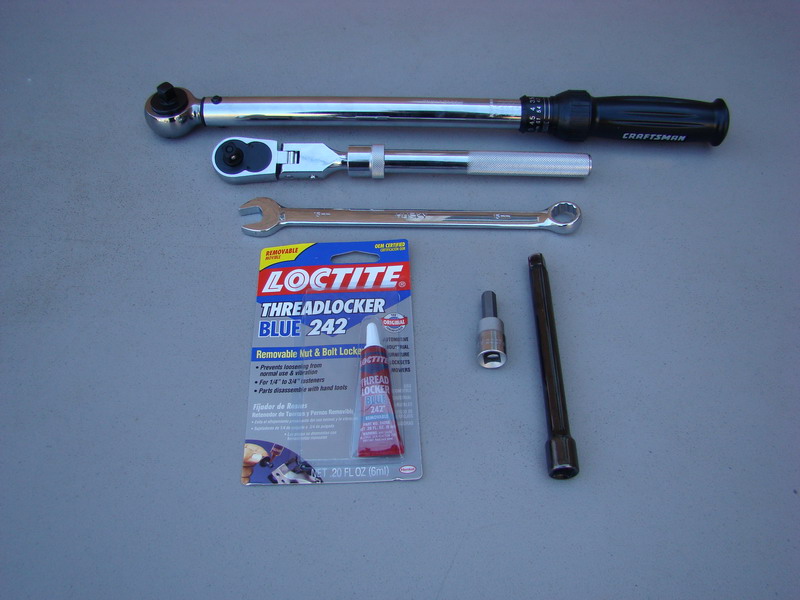
What I used to install it:
Torque Wrench- isn't a must but it's nice to have. If budget is tight you could use a breaker bar or a 1/2 drive ratchet (I purchased earlier that day a Craftsman Microtork® Torque Wrench, 10-75 ft. lbs., 3/8 in. Drive for 69.99+tax).
3/8 Drive Ratchet
3/8 Breaker Bar
15mm combination wrench
8mm hex socket, 3/8 drive
6" 3/8 drive extension
Also I Used:
Mobil Grease
Loctite Threadlocker Blue 242
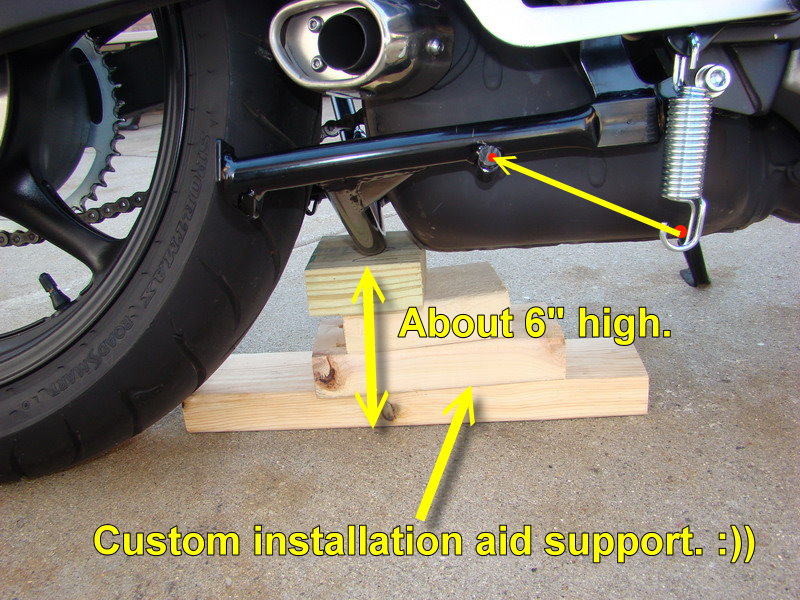
Four pieces of 2x4 (used them to support the center stand when installing the spring set)
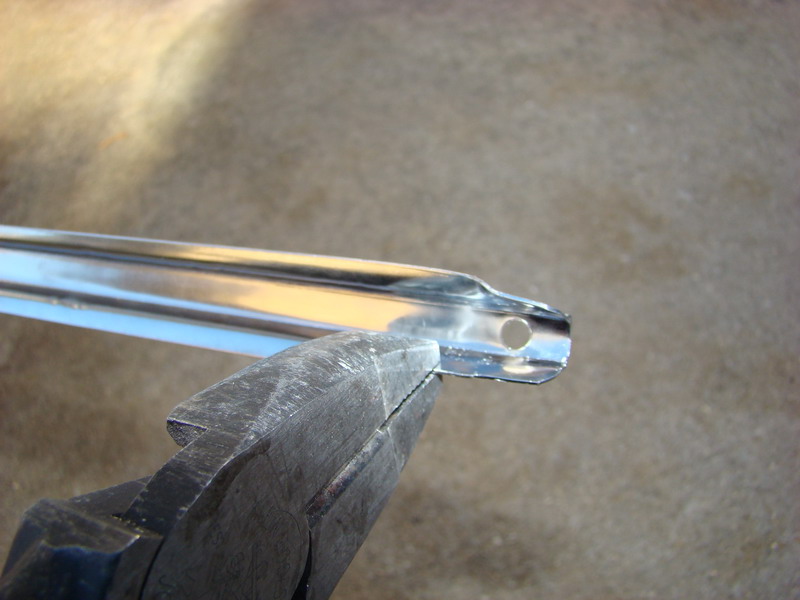
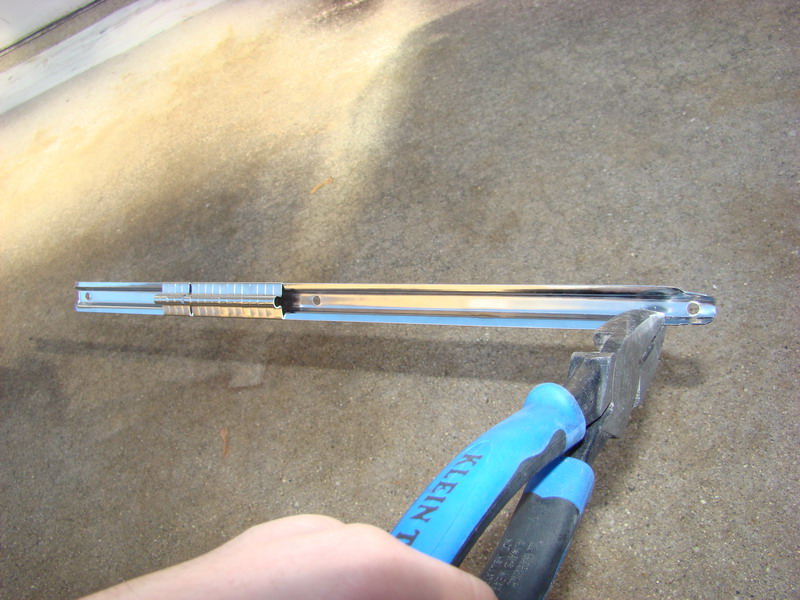
Socket Rail Set (used as a jig to install the spring set, .99 cents @ Harbor Freight )
)
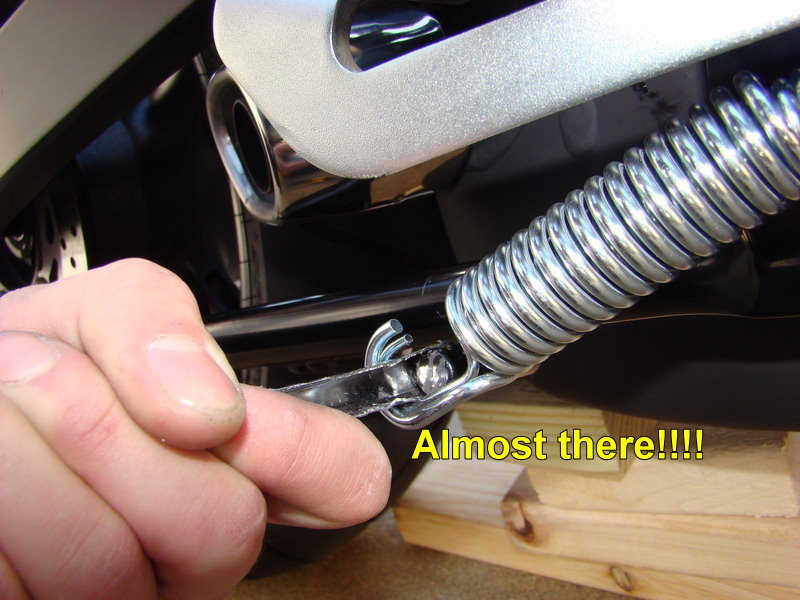
Pliers/Linensman (used to create the above mentioned jig, and to push the spring set back in place)
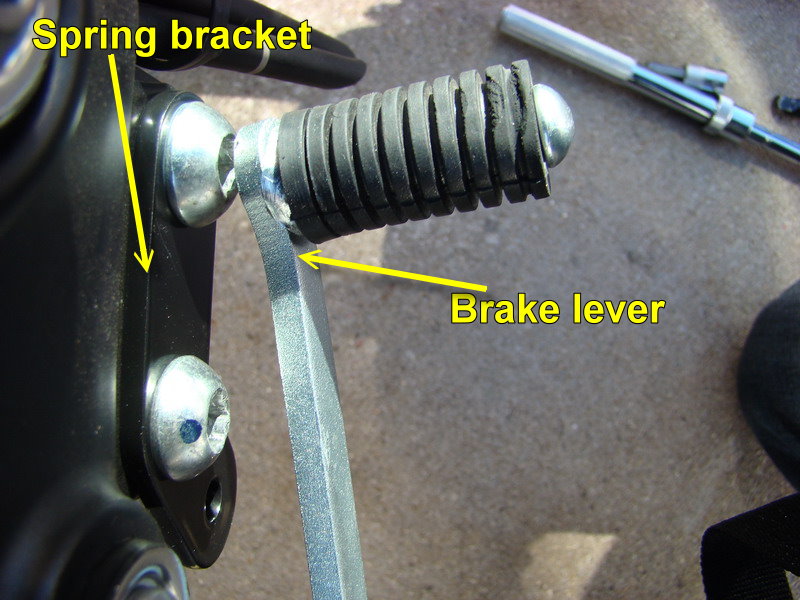
Step 1 - Spring Bracket
Remove the two original bolts using your 8mm hex socket (if you don't have one buy or borrow one, you will need it). Use the breaker bar for this, they used Loctite Threadlocker at install so you might need to use a bit of muscle.
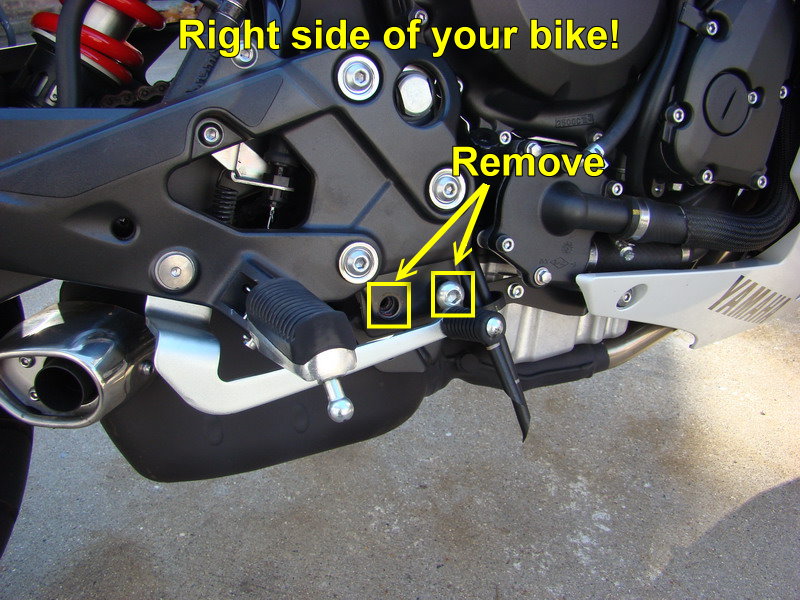
Use Loctite...
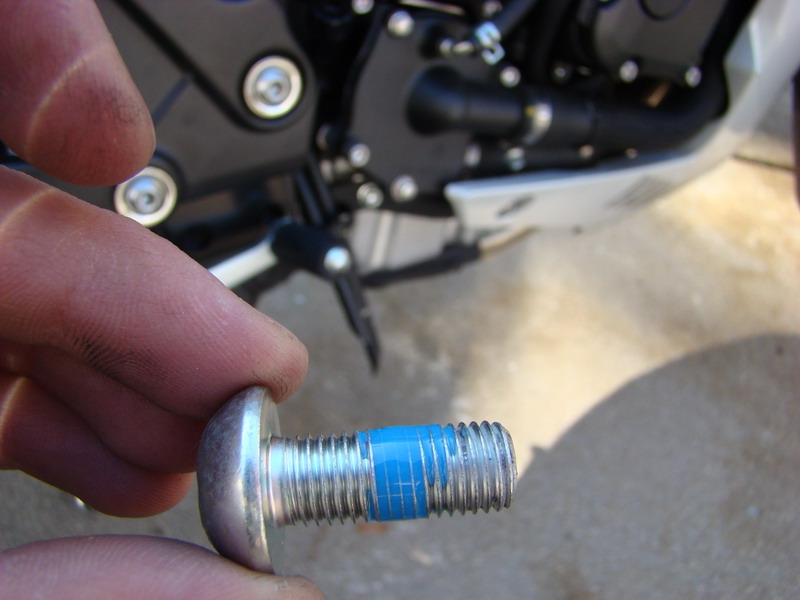
Install the spring bracket and the two original bolts. Torque bolts to 46 Nm / 34 ft-lbf.
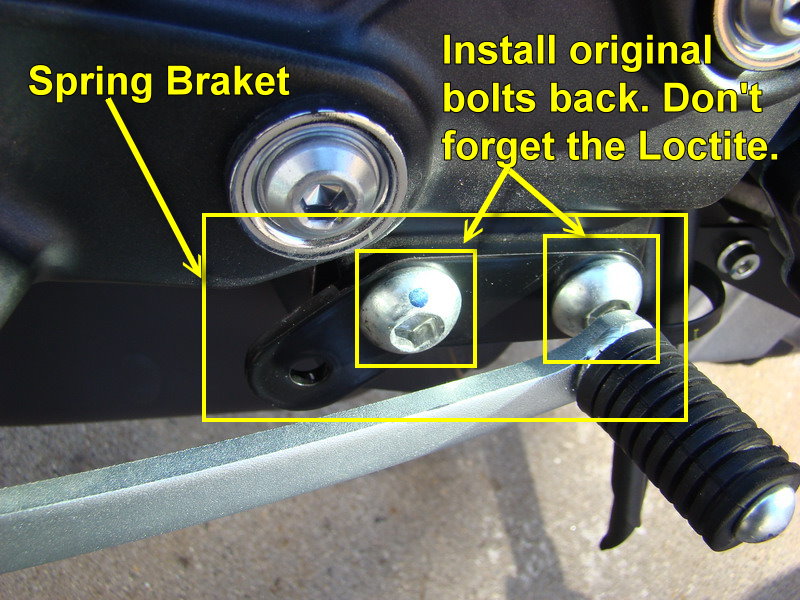
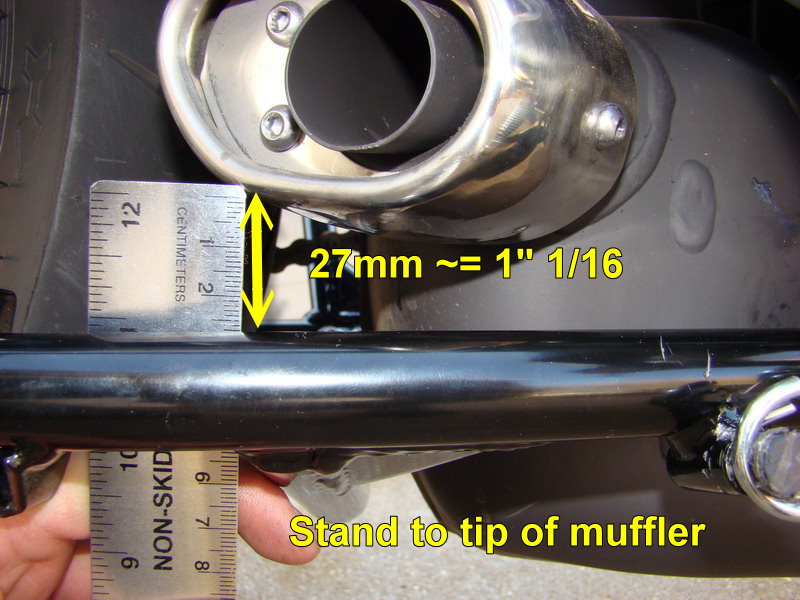
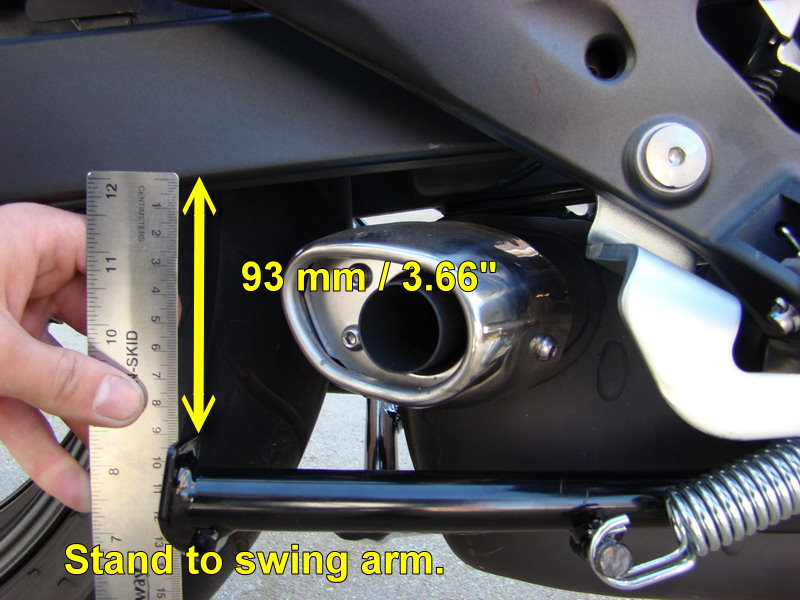
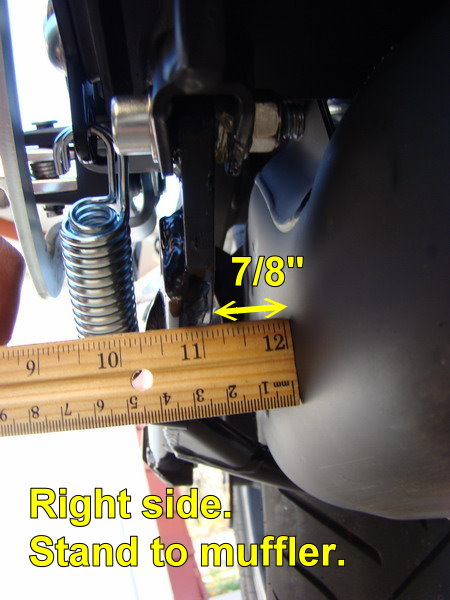
With the spring bracket installed the space between the brake lever and the bolt is real small, but it doesn't interfere with the rear brake operation.
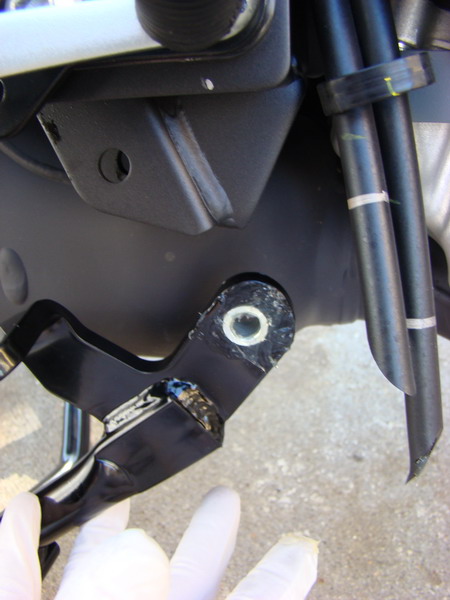
Step 2 - Center Stand
Install the Rubber Element. Use the same motion as you would use to screw in a bolt but press while at it.
Grease Bushings. Be generous grease is cheap.
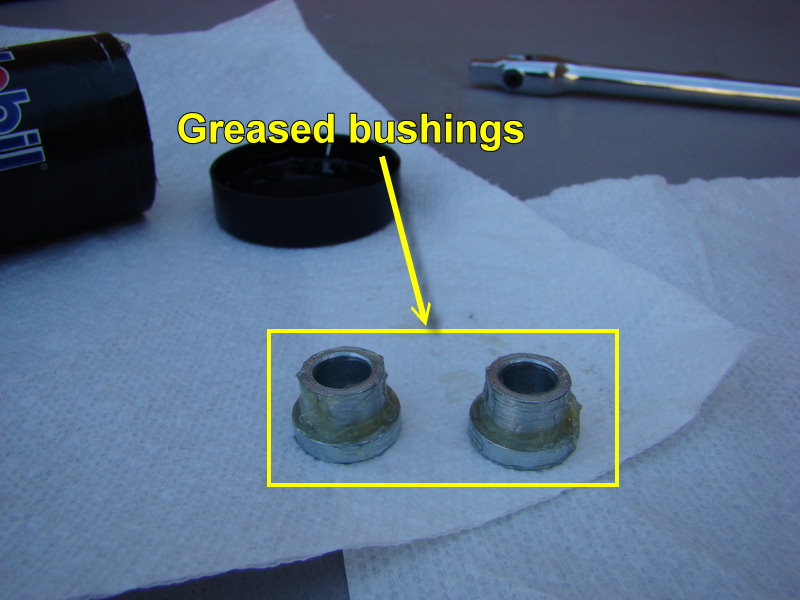
Install bushings.
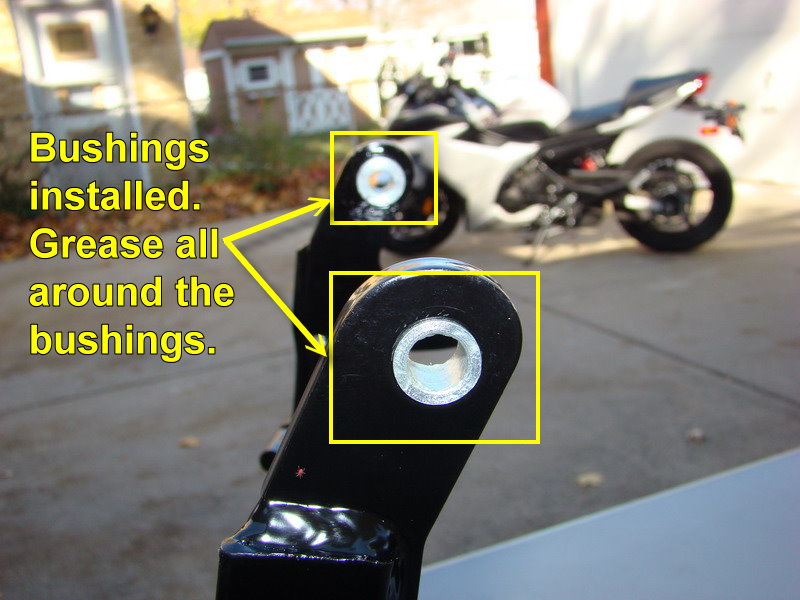
Align Center Stand. Don't forget grease well all around on both sides of the bushing.
The extra grease will also help you by holding the washer in place.
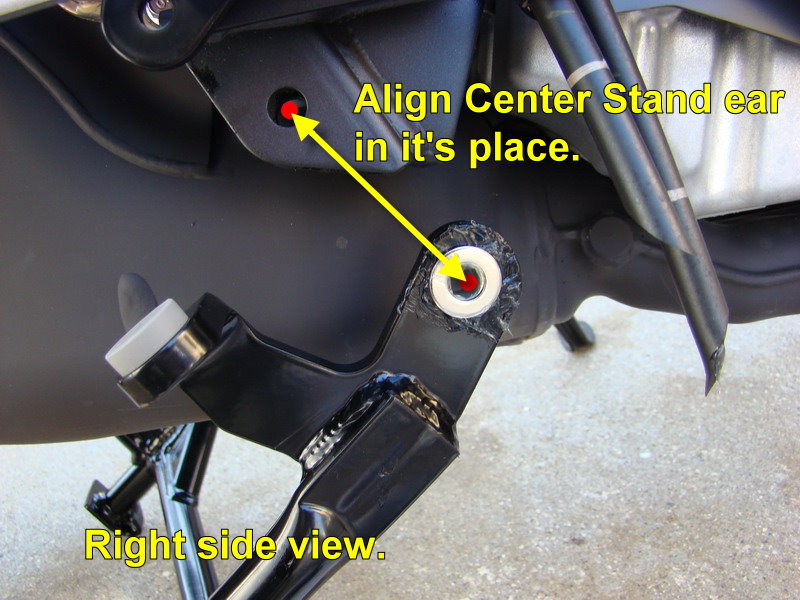
From right to left: M10 bolt, Washer, Frame Holding Ear, Washer, Center Stand, Frame Holding Ear, Lock Nut with Flange. Don't forget your Loctite.
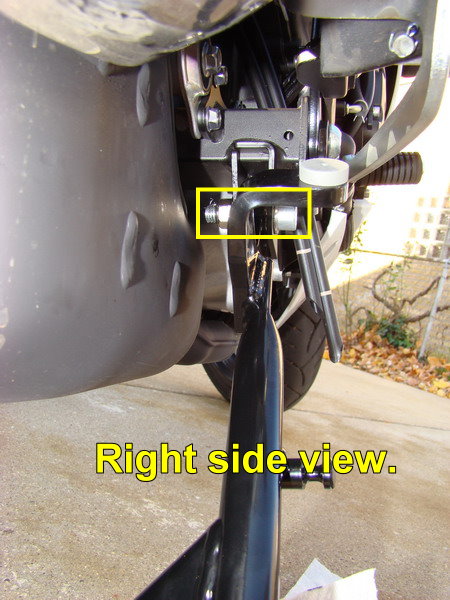
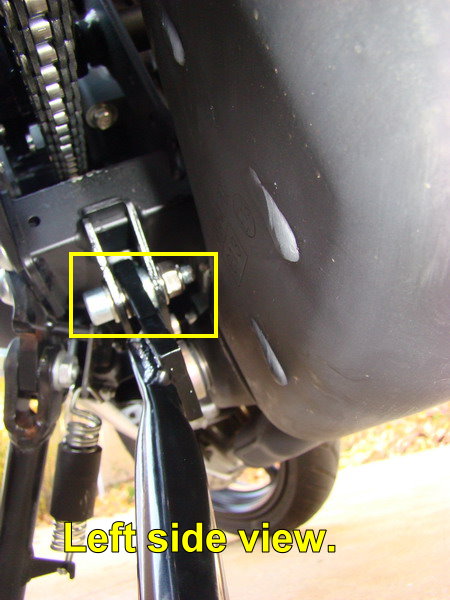
Mirror image on the other side.
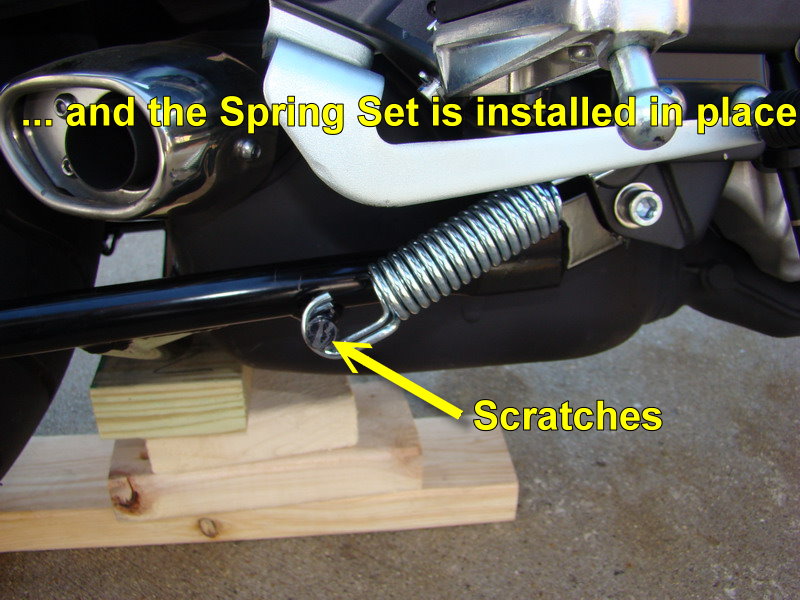
Step 3 - Spring Set
In this step you need to use your imagination and create your own jig or just use what I came up with, or spend the extra $20 for the Spring Set Installation Tool available at twistedthrottle.com IMO not worth it.
Use your linesman or plier to bend the socket rail like so:
Continued.........................
One way to repay what you received is to give back something. Well I took a lot of info and ideas out of this forum now it's my time to give something back.
I'm going to start with the "How To" install of SW-Motech Center Stand.
MAKE SURE YOU READ http://www.600cc.org/forum/f89/aftermarket-center-stand-now-available-18131/#post233266 BEFORE YOU BUY IT.
Complete name detail: HPS.06.656.10000/B SW-Motech Centerstand (Yamaha FZ6R & XJ6, '09-)
I purchased it from TwistedThrottle.com : SW-Motech Centerstand (Yamaha FZ6R & XJ6, '09-) - HPS.06.656.10000/B and end up paying $152.89 delivered.
Here is a copy of the installation instructions that came with the center stand: http://www.twistedthrottle.com/filemanager/download/2284/
What comes in the package:
Center Stand
Rubber Element
Spring Bracket
Spring Set
Bushing x2
Hexagon Socket Screw (Size: M10 x 40) x2
Washer x4
Lock Nut with Flange x2
Mounting Instructions
What I used to install it:
Torque Wrench- isn't a must but it's nice to have. If budget is tight you could use a breaker bar or a 1/2 drive ratchet (I purchased earlier that day a Craftsman Microtork® Torque Wrench, 10-75 ft. lbs., 3/8 in. Drive for 69.99+tax).
3/8 Drive Ratchet
3/8 Breaker Bar
15mm combination wrench
8mm hex socket, 3/8 drive
6" 3/8 drive extension
Also I Used:
Mobil Grease
Loctite Threadlocker Blue 242
Four pieces of 2x4 (used them to support the center stand when installing the spring set)
Socket Rail Set (used as a jig to install the spring set, .99 cents @ Harbor Freight
)Pliers/Linensman (used to create the above mentioned jig, and to push the spring set back in place)
Step 1 - Spring Bracket
Remove the two original bolts using your 8mm hex socket (if you don't have one buy or borrow one, you will need it). Use the breaker bar for this, they used Loctite Threadlocker at install so you might need to use a bit of muscle.
Use Loctite...
Install the spring bracket and the two original bolts. Torque bolts to 46 Nm / 34 ft-lbf.
With the spring bracket installed the space between the brake lever and the bolt is real small, but it doesn't interfere with the rear brake operation.
Step 2 - Center Stand
Install the Rubber Element. Use the same motion as you would use to screw in a bolt but press while at it.
Grease Bushings. Be generous grease is cheap.
Install bushings.
Align Center Stand. Don't forget grease well all around on both sides of the bushing.
The extra grease will also help you by holding the washer in place.
From right to left: M10 bolt, Washer, Frame Holding Ear, Washer, Center Stand, Frame Holding Ear, Lock Nut with Flange. Don't forget your Loctite.
Mirror image on the other side.
Step 3 - Spring Set
In this step you need to use your imagination and create your own jig or just use what I came up with, or spend the extra $20 for the Spring Set Installation Tool available at twistedthrottle.com IMO not worth it.
Use your linesman or plier to bend the socket rail like so:
Continued.........................
Last edited: