
NoDoze
New Member
Materials Required:
Head out to twistedthrottle.com and pick yourself up a set. Please give them a call to make sure they have the items you are ordering in stock and if you need it by a certain period so they can coordinate shipping, etc...
Tools Required:
Directions
Credits:
Big thanks goes out to everyone at the FZ6R Forums for being such a friendly and helpful community.
Cheers to Ajiribarren for the fitment information on the pegs and to Kevin and the rest of the folks at Twisted Throttle for providing such awesome customer service!
Version 1.0 (Revisions will be noted below)
- Added prices
Head out to twistedthrottle.com and pick yourself up a set. Please give them a call to make sure they have the items you are ordering in stock and if you need it by a certain period so they can coordinate shipping, etc...
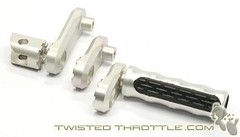
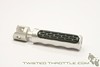
- MFW Vario Mount for Rider (MFW.051.08.01.00) $55.00/set - Note that this mount is only for the rider.
- MFW Extension Arms $55.00/set, comes in three different lengths:
- 23mm Black (MFW.051.00.00.23-8), Silver (MFW.051.00.00.23)
- 30mm Black (MFW.051.00.00.30-8), Silver (MFW.051.00.00.30)
- 50mm Silver Only (MFW.051.00.00.50)
- MFW Pegs $40.00/set, comes in three styles:
- Master Grip, Black (MFW.050.00.03.00-8), Silver (MFW.050.00.03.00-1)
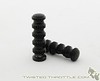
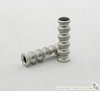
- Racing, Black (MFW.050.00.01.00-8), Silver (MFW.050.00.01.00-1)
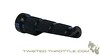
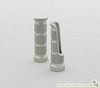
- Super Grip, Silver (MFW.050.00.04.00-1)
- Master Grip, Black (MFW.050.00.03.00-8), Silver (MFW.050.00.03.00-1)
- Two M8-1.25 x 40mm (got them from local ) - because the bolts that come with the mounts are too short. You don't need these if you are going to use the OEM clevis and cotter pin.
- Blue Locktite (optional)
- Grease
Tools Required:
- A couple of pliers
- 5mm Hex Key
- 6mm Hex Key
- 13mm wrench
Directions
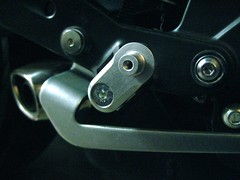
- Locate the cotter pin under the footpeg mounting bracket. The image below shows what the cotter pin looks like under the pillion footpeg.
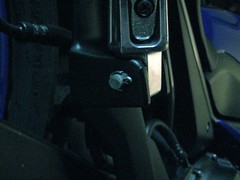
- Straighten the cotter pin holding the clevis in place and pull it straight out.
- Then pull the clevis out which will remove the footpeg.
- (Optional) Use a little bit of grease and put some on the Vario mount where it will have contact on the mounting bracket and the holes where the bolt or clevis is to go in.
- Replace the stock spring onto the Vario mount and insert it into the mounting bracket. This will require a little bit of push because of the spring. Once aligned, slide the bolt or OEM clevis on a downward direction.
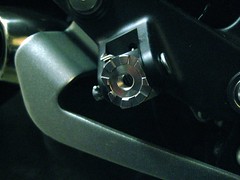
4b. If you are using the bolt: clean the thread, put blue locktite on the locknut (optional) and then screw it on.
4c. Use a 13mm wrench to secure the lock nut and the 6mm hex key to tighten.
- Select an angle position to place the Vario extension arm and place it on top of the Vario mount.
- Put locktite (optional) on the countersink screw that came with the Vario extension arm and use the 5mm hex key to screw it in.
- Put locktite (optional) on the bolt that came with the Vario footpeg and slide into the footpeg.
- Screw the bolt into the Vario extension arm and tighten.

- Push the peg up and make sure that it moves freely. If not, check to make sure there's nothing blocking the assembly or that the Vario mount is right side up.
- Repeat the same steps for the other side.
Credits:
Big thanks goes out to everyone at the FZ6R Forums for being such a friendly and helpful community.
Cheers to Ajiribarren for the fitment information on the pegs and to Kevin and the rest of the folks at Twisted Throttle for providing such awesome customer service!
Version 1.0 (Revisions will be noted below)
- Added prices
Last edited:
")