Finally----TravisH3's projector retro-fit FZ6R


travisH3

New Member
Yeah haven't been out yet this year. Had surgeries and been healing up. May get her out tomorrow though, been itching. I saw some businesses here that used water softener tabs in lieu of normal salt.
yeah alot of people had to resort to the home remedies the last ice storm we got lol
 

Scott_Thomas

Insert title Here
Elite Member

travisH3

New Member
Flippin winter from Hell!!!!:zombie:
Amen. We own our own construction/remodeling/excavation business and we do snow plowing during the winter months and even we are sick of the snow lol
 

travisH3

New Member
It's done. I'm uploading the pics now to photobucket so I should be able to post everything tomorrow showing it installed. I was able to roll it out of the shop and get the headlight somewhat aimed. The shroud is very close to touching the outer trim piece at the top so I'm Hoping the light doesn't have to go up much more. I'm thinking this is due to having the front end lowered about an inch. If not I may be able to shim the headlight up a hair with the mounting screws. But I'm hoping it works. First thought in my driveway was the light had good cutoff and but I'm not overly impressed with how much light is there but maybe it was just my driveway. I will give a 100% review once I take it for a spin in the dark. May try to take it out tomorrow night if I want to brave the cold since tomorrow the high is 42 and low is 23 lol. Check back tomorrow for updates.
 

Scott_Thomas

Insert title Here
Elite Member

travisH3

New Member
HID has a sharp cutoff unlike standard bulbs. At least the projected HID. I know even on low beam I can see on either side of the road and fairly far with mine. If you could take a pic of your beam on low and then high. Which bulb are you using?
It's the mini h1 projector with 5000k color temperature. I will post my results after tonight after I go for a ride and see if it needs more adjustment.
 

Scott_Thomas

Insert title Here
Elite Member
Last edited:

travisH3

New Member
ok, so test fitting projector and shroud i found out that the shroud was very close to the housing so i did a little trimming for clearance(after having the light on the bike i found out after adjustment the shroud is still very close to the housing so i would make sure you have a 3/16" gap if you go with these over size shrouds. i had about an 1/8" gap)


here is a picture of it assembled without the headlight sealed up


I put the oven on 250 degrees. put it in for 7 minutes and sealed the headlight back up. i then put the light back in for another 4 minutes and pressed it real good to make sure it was tight. I let the light sit a day before it went back on the bike


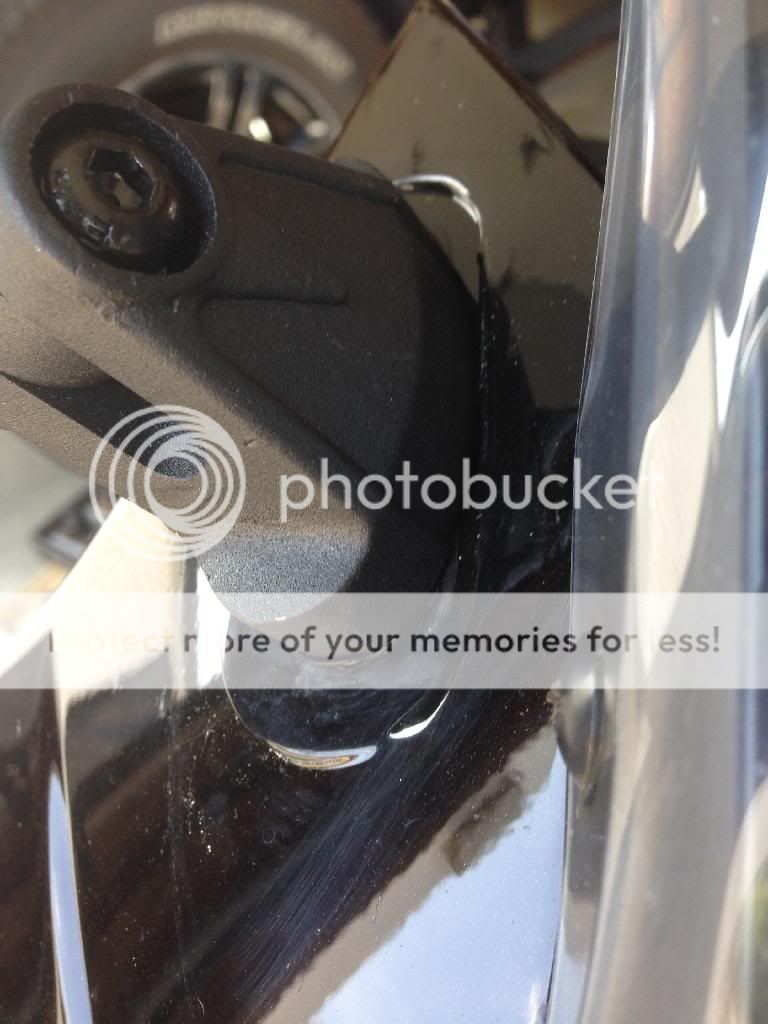
dont forget to seal up the housing at the rear for the LED's power and ground to come through. i used clear silicone to make sure no moisture gets in


when installing, i realized there was not a clean way to run the wiring for the HID harness without removing the tank and intake. so i removed it all and ran my wiring nice and neat with the factory wiring.


Believe it or not i think the hardest part of this build was finding where to mount this dang ballast. I decided to mount it to the fairing behind the air dam. this keeps it secure and out of the way. Also it gives plenty of room for the forks to swing back and forth(when doing this mod pay extra attention to where you run wiring through the forks and what you zip tie wires too. alot of that stuff moves with the handle bars and you dont want to cause chaffing or tugging on wires when you steer the bike so make sure you move the steering wheel back and forth so that no wires are pulled.)


In this next picture is the connections for my LED and high beams. for the high beams(plug by my thumb) the plug included with the kit wouldnt make a good connection when the plug was snapped together but if you pulled the plug back some it would connect and work fine for the high beams. i also noticed the connection wasnt totally water tight around the wires so i just installed a new 2 prong plug thats better quality so i didnt have High beam issues while riding. I used a little bit of a dielectric grease in all my connections.


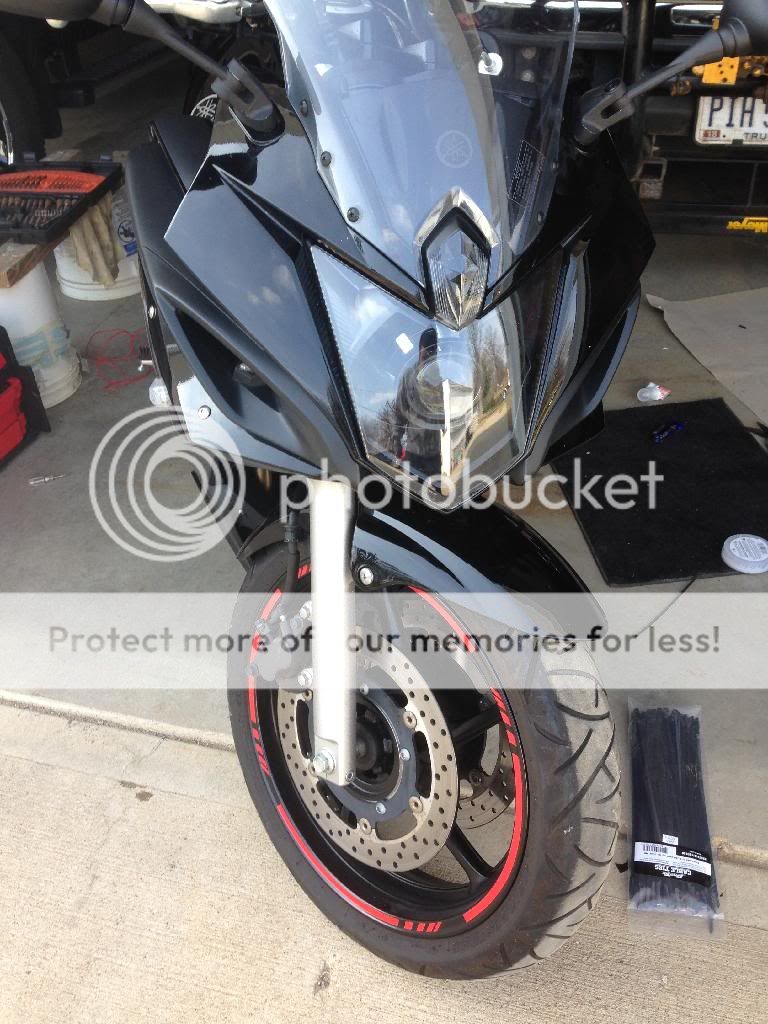
here is a picture of the front end assembled, kinda hard to see the light with the glare. i plan to get my good camera out and get better pictures for you all to see.


this picture you can kinda see the 100mm led behind the shroud. it looks killer. also regarding the shroud, the projector is supposed to be recessed in the shroud but i mounted mine with the projector even with the shroud. if i wouldnt have done this, the projector shroud would have made contact with the lens of the light plus i think it looks better this way.


here is a picture of the batter connections. i notched little openings in the plastic battery hold down for the negativie battery connections to pass through to make sure wires didnt get chaffed for the ground connections. i wrapped the fuse holder with electrical tape because the fuseholder on the hid harness isnt weather-tight and tucked it down behind the battery.


also heres a pic of where i have my PCV installed


another picture with the zx6r mirrors installed


just in case i didnt like these mirrors i didnt want to cut up the rubber piece for the factory mirrors so i used electrical tape with quite a few layers to make a gasket for the mirrors to dampen vibration (this was recommended in another thread)


travisH3

New Member
Okay, I was thinking maybe you got a much higher bulb 6k is the highest degree with blue tint that still provides good light. I have the 6k bulb. Anything higher and you lose usable light. Not the problem here though.

Sent from my SAMSUNG-SM-N900A using Tapatalk
yeah i understand the HID colors. the whiter the light more useable light you get thats why i chose 5k. the hondas you see on the roads with 10k blue/purple headlights barely put out anything lol
 

Scott_Thomas

Insert title Here
Elite Member

travisH3

New Member
You get it sorted? Just an aiming issue?

Sent from my SAMSUNG-SM-N900A using Tapatalk
im hoping so lol. i will know once i take it for a ride. that or have someone sit on the bike while i aim it at the garage door. its hard to do by your self haha
 

Rabbitman109

Lumen Junkie
Elite Member

travisH3

New Member
Looks good! The trimming of the shrouds is a fine art, since you have to make sure that the projector is aimed high enough. You removed the reflector bowl so you could paint right? When I receive a headlight, I tape off the halogen beam pattern, so when I am done, I can re-aim the projector beam based on that original height.

Also, the thing to remember about moisture, is that there will always be fresh air going into the headlight, as they have built in vents in the back of the headlight. Since the HID bulb is hotter, there is a possibility of condensation. This is usually fairly minor and goes away fairly quickly. If you are having issues, I would suggest drying out with a hair dryer, put in a desiccant to help absorb any further moisture.
I removed the reflector bowl but counted the turns to remove it to put it back to where it was, so I figured it would be close but I guess the projector is pointed down some. Idk, I'll get it figured out. No moisture issues. As of yet and we have had a lot of cold nights and warm days. I doubt it will have moisture problems. I didn't with stock and I made sure everything was good and sealed.
 

Rabbitman109

Lumen Junkie
Elite Member

travisH3

New Member
You're a better man than me, way too many turns to count that. I actually use a drill to loosen and tighten those adjusters quickly (since turn around time is key). I generally only have a little fogging in the corners, and when it is really warm/hot, there is no moisture issues at all since the air temperature is closer to the temperature inside the headlight.
haha. i was taking my time making sure i was doing it right. knowing what i know now i could prolly do twice as good of a job on the second one and alot faster.

i was able to park the bike 25feet away from the garage door and do the aiming this morning but cant road test. i was messing with my exhaust and the clamp broke so im waiting on a new one and i started the bike in my garage to get the headlight on and it sounds like a drag bike lol. new clamp should be in tomorrow morning. the shroud isnt touching the housing anymore and the light may have to go down some(which is good because that means away from shroud) but i wont know for sure until out on the road and see where the light goes and make sure it isnt effecting the others. ive posted the progress on my facebook and instagram and everyone is loving it. now the weather needs to get above 50 degrees again. i cant handle this cold weather anymore.

heres a picture of the cutoff line against my garage door. bikes leaning a hair but the line is pretty level. not too shabby for a retro-fit newby :D


travisH3

New Member
So far the light has been great! everyone has been giving me lots of awesome feedback and asking where to buy the parts for them to do theirs. Im glad I got this mod done and after quite a few rides the lights holding up and Im happy. thanks Chad(rabbitman109) for the help and also a thanks to The Retrofit Source for all their awesome How-to videos on youtube to give out those little tips and tricks for us amateurs to follow!

I also added an itemized list to the first post so you can see exactly what i got and the pictures on their website. enjoy and hope this thread helps anyone else going at it on their own!
 

travisH3

New Member
Looks great! Seems like a lot of work to get there though.


Sent from my iPhone using Tapatalk
It's not too bad if you take your time. The work is worth all the compliments you get anyways lol
 

Rabbitman109

Lumen Junkie
Elite Member


Top